
Manage your machine learning experiment with Mlflow Part 1
Track your experiment with mlflow


Introduction
Working in jupyter notebook or in a project finding the right machine learning algorithm is exciting switching between ml models and playing with hyperparameters. Having where all this information is stored can help ease your work. Viewing all your experiments and the information associated with them may help you take the best decision to build a successful machine-learning model.
In this blog, I will show you how to manage your experiment and model with Mlflow. I will show you how to log your hyperparameter, compare them, register, serve, and deploy your machine learning model.
Setup
Create a virtual environment with conda and activate it
conda create -n mlflow python==3.9
conda activate mlflow
Install the necessary packages
pip install numpy pandas matplotlib scikit-learn sweetviz jupyter
Create a train.py file and import these libraries
import numpy as np
import pandas as pd
import matplotlib.pyplot as plt
from sklearn.model_selection import train_test_split
from sklearn.metrics import mean_absolute_error
from sklearn.metrics import mean_squared_error
import mlflow
import mlflow.sklearn
from mlflow.models.signature import infer_signature
import os
from sklearn.linear_model import LinearRegression
Dataset and EDA
We will work on house prediction with the Boston dataset the dataset can be found there. Download it in unzip it into your working directory.
The dataset I constituted of 14 columns each representing.
CRIM : Crime rate per 100,000 residents by town

ZN : proportion of residential land zoned for lots over 25,000 sq.ft.

INDUS : proportion of non-retail business acres per town

CHAS : Charles River dummy variable (1 if tract bounds river; 0 otherwise)

NOX : nitric oxides concentration (parts per 10 million) [parts/10M]

RM : average number of rooms per dwelling

AGE : proportion of owner-occupied units built prior to 1940

DIS : weighted distances to five Boston employment centres

RAD : index of accessibility to radial highways

TAX : full-value property-tax rate per $10,000 [$/10k]

PTRATIO : pupil-teacher ratio by town

B : The result of the equation B=1000(Bk - 0.63)^2 where Bk is the proportion of blacks by town

LSTAT : % lower status of the population

MEDV : Median value of owner-occupied homes in $1000's [k$]

Correlation matrix
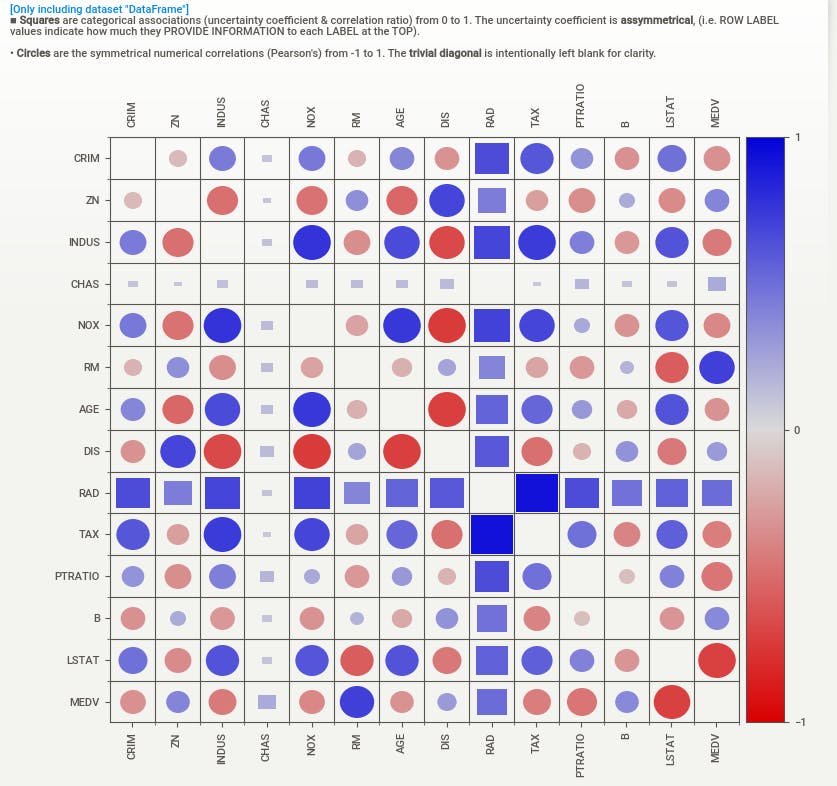
We are trying to predict the value of Median home value in thousands of dollars (MEDV)
Mlflow project
To start using Mlflow we need to set up the project by creating a project file named MLproject in your working directory and adding this content
name: MLflowProject

conda_env: environment.yml

entry_points:
  main:
    command: "python train.py"
The MLproject file is a YAML formatted file describing the project name MLflowProject , the environment in this case conda_env (You can generate the environment.yml by running this command conda env export > environment.yml ), and the entry point that runs train.py file
Experiment tracking
Before starting inside the if __name__ == "__main__": you need to define the tracking uri and the experiment.
mlflow.set_tracking_uri(os.environ.get("MLFLOW_TRACKING_URI"))
EXPERIMENT_NAME = "demo"
EXPERIMENT_ID = mlflow.set_experiment(EXPERIMENT_NAME)
The code
mlflow.set_tracking_uri(os.environ.get("MLFLOW_TRACKING_URI"))sets the tracking URI to the value of the environment variableMLFLOW_TRACKING_URI. If the environment variable is not set, the tracking URI will be set to the default value, which isfile:///tmp/mlruns.The code
EXPERIMENT_NAME = "demo"sets the experiment name todemo.The code
EXPERIMENT_ID = mlflow.set_experiment(EXPERIMENT_NAME)gets the experiment ID for the experiment namedemo. If the experiment does not exist, it will be created.
In the train.py file inside the if __name__ == "__main__": block Read the dataset
boston_data = pd.read_csv('boston.csv')
Remove labels and training features
y = boston_data.MEDV
X = boston_data.drop(['MEDV'], axis=1)
Split the data
X_train, X_test, y_train, y_test = train_test_split(X, y, train_size=0.8, test_size=0.2, random_state=0)
Create a model
model = LinearRegression()
The line of code
model = LinearRegression()creates a linear regression model. A linear regression model is a type of machine learning model that can be used to predict a continuous value from a set of input features. The model is created by fitting a line to the data, such that the line minimizes the sum of the squared errors between the predicted values and the actual values.
Next, you need to start a Mlflow run
with mlflow.start_run() as run:
The line of code
with mlflow.start_run() as run:starts a new MLflow run. An MLflow run is a unit of work that can be used to track the progress of a machine learning experiment. Each run has a unique ID and can be associated with a set of parameters, metrics, and artifacts.The
withstatement ensures that the run is properly closed when the code block is exited. This is important because it ensures that any metrics or artifacts that were logged during the run are properly persisted.The
runobject that is returned by themlflow.start_run()function can be used to log parameters, metrics, and artifacts. The following is an example of how to log a parameter and a metric
Inside the with statement train the model
model.fit(X_train, y_train)
Now let's start logging some parameters
Log the intercept and the coefficient
mlflow.log_param("Intercept", model.intercept_)
mlflow.log_param("Coefficient", model.coef_)
OR more just by enabling autologin this case like this
mlflow.sklearn.autolog()
The
mlflow.sklearn.autolog()function enables autologging for scikit-learn estimators. Autologging automatically logs the following information for each estimator:
The estimator's parameters
The estimator's training metrics
The estimator's artifacts
To use
mlflow.sklearn.autolog(), simply import the function and call it before you create the estimator.model = LinearRegression()
Let's log evaluation metrics on a test set
predictions = model.predict(X_test)

mae = mean_absolute_error(y_test, predictions)
mlflow.log_metric("mae", mae)

mse = mean_squared_error(y_test, predictions)
mlflow.log_metric("mse", mse)

rmse = np.sqrt(mean_squared_error(y_test, predictions))
mlflow.log_metric("rmse", rmse)

rmsle = np.log(np.sqrt(mean_squared_error(y_test, predictions)))
mlflow.log_metric("rmsle", rmsle)
The code you will log the values of the MAE, MSE, RMSE, and RMSLE to the MLflow tracking server.
If you want to explicitly log the model you can it like this
signature = infer_signature(X_test, predictions)
mlflow.sklearn.log_model(model, artifact_path="sklearn-model", signature=signature)
The
mlflow.sklearn.log_model()function will log the model to the MLflow tracking server. The model will be stored in a format that can be used by other tools, such as MLflow Pipelines and MLflow Models.
You can visualize all your logs MLflow UI. MLflow UI is a web-based interface that can be used to track the progress of machine learning experiments. The UI allows you to view the parameters, metrics, and artifacts that were logged during an experiment. You can also use the UI to compare different experiments and to share the results of your experiments with others.
mlflow ui
Conclusion
In this article, we have seen how to log experiment data with Mlflow in the next part of this blog we will how to manage models and deployment with Seldon core on AWS